NetCIL Web Forms User Guide
Applies to: NetCIL Online
Updated:
1/18/2013
Quick Links: People
NetCIL Web Forms are designed to supplement NetCIL Online applications by providing browser-based access to basic NetCIL data. You can use web forms to enter demographic information and write notes about individuals, and you can record indirect service (Work Log) entries. NetCIL Web Forms have been optimized for use on devices like iPads and Android-based Galaxy tablets, but they can be used on any device that supports a web browser. If you are running a device with a full Microsoft operating system, you can also launch NetCIL Online applications from your web site. Note that Microsoft RT Surface tablets do not support full database applications, but Intel-based Surface Pro tablets do. At present, NetCIL Web Forms are only available on NetCIL installations that are hosted on Amazon AWS virtual servers.
To use NetCIL Web Forms, follow these steps:
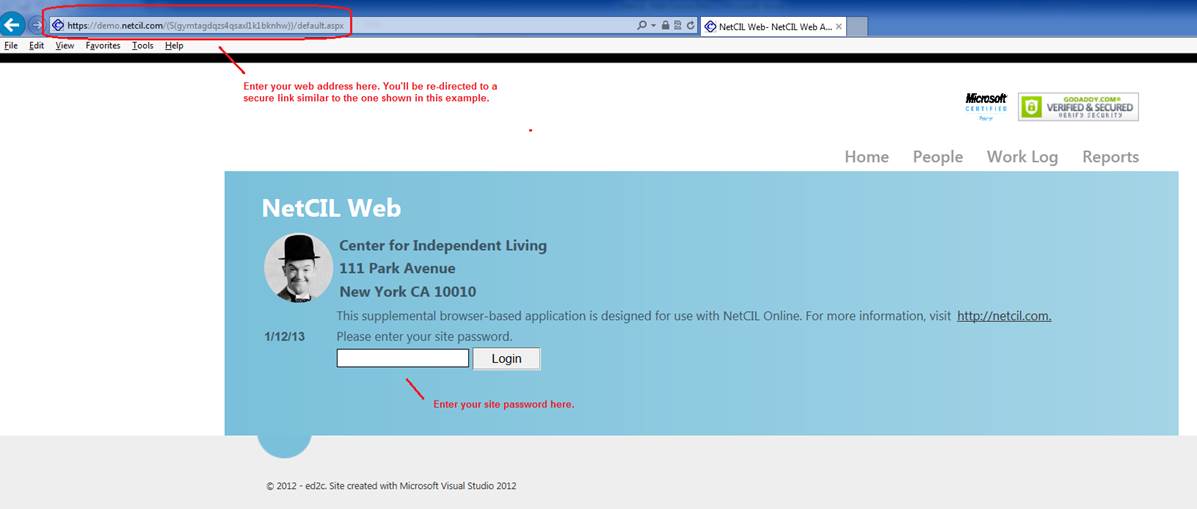
Step 1: Open the web browser of your choice and enter the address of your website. It will probably be {your city}.netcil.com. If you don’t know your web address, call us.
Step 2: You will be routed to a secure web session. Enter your site password.
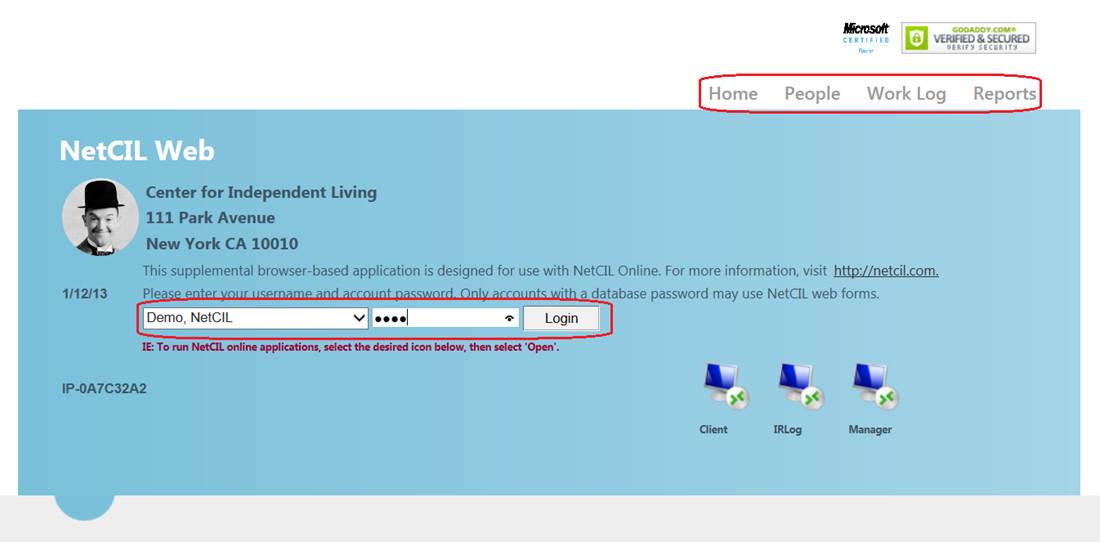
Step 3: Select your database username from the dropdown list, and then enter your personal database password. Your name will not appear in the list unless your password meets the following complexity requirements: At least six characters in length, a mix of upper-and lower-case letters, and at least one non-alpha character. After a successful logon, select an option from the web menu in the upper right corner as shown below.
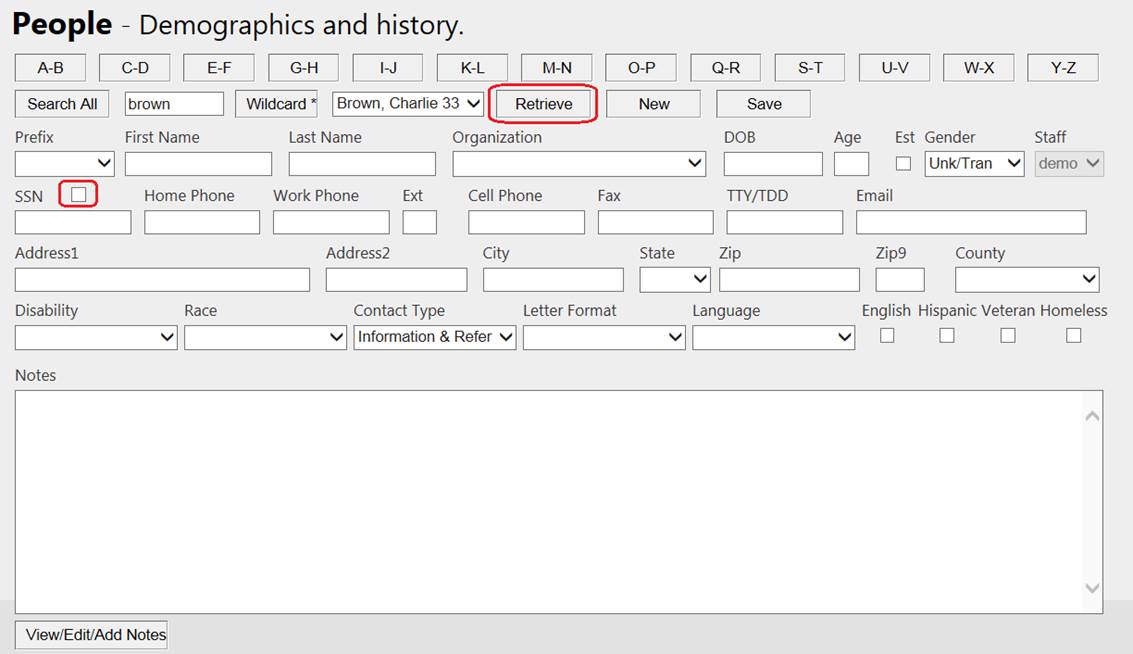
To enter a new record, simply select “New” (ALT-n), enter information as desired, and then press “Save” (ALT-+). To retrieve an existing record, first create a search list by selecting one of the search options, and then select “Retrieve” (ALT-r). Pressing “A-B” (ALT-A) will create a list of all entries whose last names being with “A” or “B”. By entering a name in the Wildcard field and then pressing “Wildcard” (ALT-*), you can create a list that is based on your entry. “smith” will return all entries with last name “Smith”; *smith* will return entries like “Aerosmith”, “Smith”, “Smithson”, and “Aerosmithson”. The search string is not case-sensitive. You can also select “Search All” to create a list of all records, but doing so may be slow depending on the size of your database. Note that Social Security numbers, if recorded in your database, will not be retrieved unless you select the checkbox next to “SSN” (ALT-!).
The same basic user privilege levels that apply to NetCIL Online applications apply to NetCIL Web Forms. Users with privilege level 5 or higher may edit basic demographic information that has been recorded by other users; privilege level 8 or higher allows edits to notes that have been written by others. “Staff” fields cannot be edited in NetCIL Web Forms.
When an individual record is created or retrieved, a message will appear to remind you that any edits are not saved until you press “Save”. If your privilege level does not allow edits, an appropriate message will be displayed. To edit or add notes, select the desired record as shown below. If you press “View/Edit/Add Notes” (ALT-.) without selecting a record, the most recently-recorded note will be retrieved and displayed.

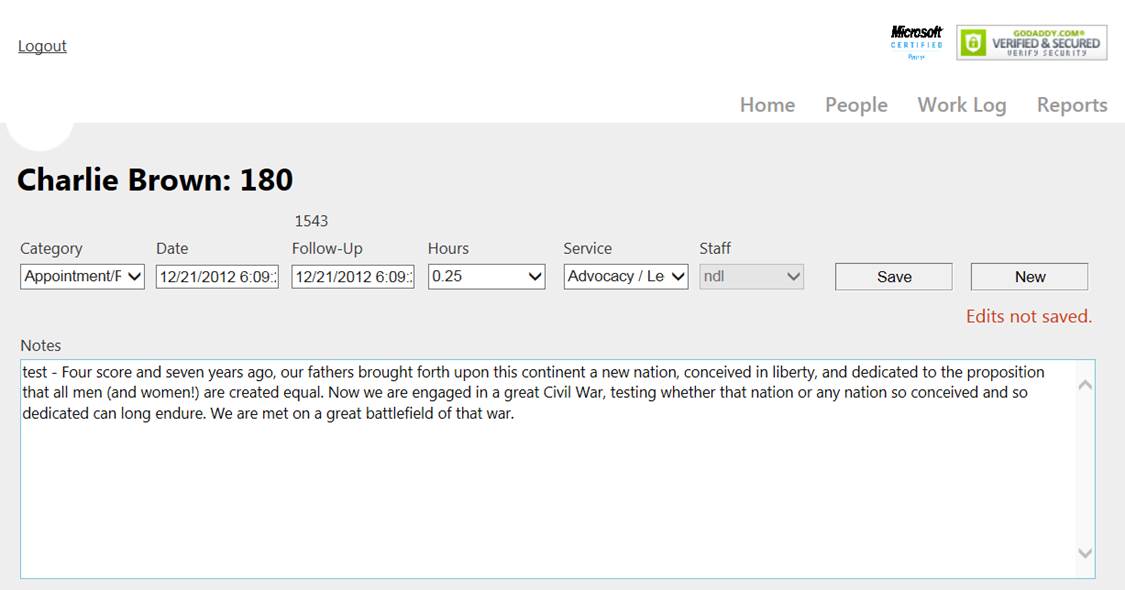
As with basic demographics, a message will appear to remind you that any edits are not saved until you select “Save” (ALT-+). If your privilege level does not allow edits, an appropriate message will be displayed. When you are finished adding and editing notes, you can return to the main “People” form by using the “back” button of your browser or by selecting “People” from the menu in the upper right corner. The demographic information of the record on which you are working will be re-displayed.
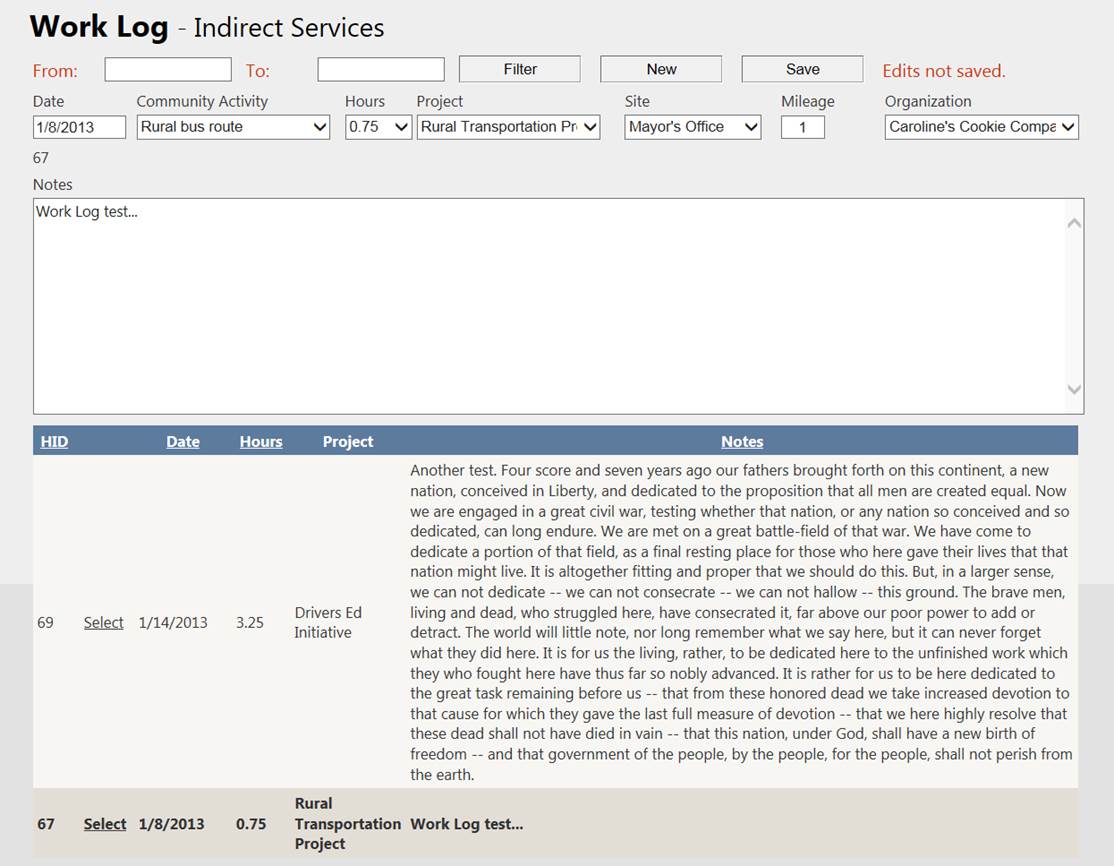
When you select Work Log from the NetCIL Web Forms main menu, a form like the one shown below will open. By default, Work Log entries written during the previous 90 days will be displayed. You can change the date range by selecting “From”(ALT-f) and “To” (ALT-t) values and then pressing “Filter” (ALT-f). Work Log edits and additions function in the same manner as other NetCIL Web Forms. If you select a “Community Activity” (ALT-c) and leave “Project” (ALT-p) blank, software will look for an associated Project and enter the value for you, just as NetCIL Online applications do. The reverse process will also apply if a Project is specified and Community Activity is left blank. If you enter a known “Work Site” (ALT-w), Mileage information will be recorded for you. If “Work Site” is left blank, you can still manually record a mileage value. Unlike NetCIL Online applications, it is not possible to add a Work Site when using NetCIL Web Forms.