NetCIL/CFAL Client 1.25 New Features
Applies to: CFAL
Version 5.25, NetCIL Desktop 1.25, and NetCIL Online
Updated: 4/29/2012
NetCIL Client Versions 1.2x (and CFAL 5.2x, when released) represent a
major redesign of the NetCIL application.
All forms have been reworked to take full
advantage of the many new features that are inherent in Microsoft Access
2010. Users can modify the appearance of
any form by use of the color and shape pallet. Appointments, open referrals,
and assigned tasks are all displayed on the Main
form. Double-clicking on an appointment
or referral entry takes the user automatically to the corresponding consumer record. Double-clicking a task will automatically
enter it into a user’s work log. A new
work log form has been added as well as a number of
new reports. The application has also been updated to support recent changes to Chapter
II Blind Field Services (BFS) reporting. Minor bug fixes and enhancements are
released as 1.2x. A brief summary of the changes is given below. Following are quick links to new features:


Quicker
and easier data replication and synchronization – on or offline, in the office
or in the field. Manage
appointments and referrals with a mouse-click on the front page. Complete
integration with scheduling systems like Microsoft Outlook. Easily convert
referrals from other staff into appointments for yourself.


Easier
configuration of projects and tasks for staff. Just mouse-click a task to enter it into your work
log, and export data to billing systems for fee-for-service.

The NetCIL Tools
toolbar contains the most-used, most-useful features of Microsoft Office and
NetCIL functions.

- Selecting “Colors and Shapes” opens the following form. Users can select a wide variety of color and shape combinations for buttons, fonts, and labels. When an option is selected, the appearance of the Main form in the background will change to show how the selected options will appear. If the user chooses “Save”, all forms will open with the selected appearance. If “Cancel” is pressed, all forms will revert to the most recently-saved configuration. With this new capability, it is no longer necessary to select “High Contrast” for visually-impaired users, although the capability to do so remains via the new Colors form and NetCIL Manager. Users can select any color combination that they wish in order to maximize the visibility of input forms without affecting other applications.

- Appointments are defined by a new field called "Follow-up or End Date". As long as a follow-up date is specified and no outcome is recorded, the appointment will appear on the Main screen. Any record with a follow-up date can be exported to your calendar application by pressing the "vCalendar" button. You can open the appointment record by double-clicking its corresponding entry on the Main screen. You can also close the appointment from the Main screen simply by selecting an outcome.

- Open referrals can also be accessed
from the Main screen by double-clicking on the corresponding record. A
referral will remain "open" until a completion date is specified. You can enter a completion date from either the Referrals form or directly in its
record on the Main screen.

- Assigned tasks are
now displayed on the Main form and on a new form called Weekly Log.
- The Weekly Log is designed to facilitate the quick entry of an entire day’s activities. Optional fields are provided to record start and stop times, break time, and direct service hours. The “Service” field is calculated automatically as the sum of all time recorded in an individual’s file (the “Notes” and “Referrals” forms), excluding Group Case Notes, which are already recorded in the Work Log forms. To aid as a check against discrepancies, a “Difference” value is also calculated automatically. Diff = Stop - Start - Break - Service. Double-clicking an assigned task adds it to your work log – the Project field will be filled in automatically. If only one Community Activity is associated with the project, it will be filled in as well; otherwise, a dropdown list of all associated activities will be configured. Selecting "Work Log" from the tab above or button below allows users to view and edit other details of the current record.
Users with sufficient privilege (9 or higher) can view and edit the weekly logs of other users.

A
new field has been added to the People form called
“Code”. The field allows you to mask some or all of the data in an individual’s
record. Social Security numbers are now masked until a user clicks or tabs to the SSN
field. If no code has been specified,
the SSN will be displayed, but only when the cursor enters the SSN field. If a one- to three-digit code is stored, the
SSN will be masked until the correct code is
entered. If the code contains four or
more digits, the entire record will be inaccessible until the correct code is entered. Users
with privilege level 9 or higher do not need to enter a code in order to access
information. Only users with privilege level 9 or higher may apply a four- or
more-digit code to a record. If your agency needs to store social security
numbers, it’s recommended that you establish a
standard, agency-wide three-digit code to be used for locking SSN data.

To support new BFS reporting, fields have been added to the Consumer History table (accessible
via the Notes form) that allow users to select BFS grants and outcomes for a
particular BFS service.

The
ability to convert a referral into an appointment has been
added. If another staff member has referred someone to you, either thru
NetCIL Client or the NetCIL IRLog application, you can convert the referral
record into an appointment. Upon conversion, any services, notes, hours logged,
and grant information will be transferred to a new
consumer history record. The record type
will be set to “Appointment/Follow-up”, the follow-up
date will be set to the end date of the referral. You must specify an end date
for the referral before you can transfer the record. You can only transfer records for which you
are the referred-to staff member. Users
with privilege level 9 or 10 may transfer any record. To avoid duplication, all
service, grant and hour information will be set to blank in the referral after
transfer. Notes in both forms will be appended with
information about the date of transfer. NetCIL version 1.22 no longer
auto-fills a completion date; all referrals must be closed
manually via the Referrals form or from the NetCIL Main form by specifying a
completion date.


NetCIL automatically creates a reserved project called “Staff Meeting”. You can use this entry to schedule staff meetings and to alert staff and volunteers via integration with your calendar applications. To schedule a meeting, retrieve the “Staff Meeting” project as shown below:

Next, create a task for the meeting that you wish to schedule. The
“Task” will become the title of your meeting invitation, and the “Description” will be displayed in the body of your message. You can of
course edit these values before sending your invitation. At a minimum, you must
name the task and specify a start date; All other
fields are optional. If you specify estimated hours, the “Target End” time will
be calculated automatically; otherwise it will default
to one hour. If a value of 30 or more is entered, the estimated time will be
calculated in minutes; otherwise the value will be
calculated in hours. Only whole numbers can be entered.
After creating the entry, select Staff and Volunteers to invite as appropriate.
If you press the “Assign to All” button, all active staff members who are listed as database users will be invited. Volunteers must be added individually. You can remove individual
entries by right-clicking on the record selector
(left-hand column) and then selecting “cut” from the pop-up menu.

When you’re ready to send your meeting
invitation, press “vCalendar”. A standard-format
calendar file will be created. If your computer has a
calendar and email application installed, the calendar file will automatically
create a meeting invitation. The invitation will be e-mailed to all invitees
for whom a valid email address has been recorded, either in
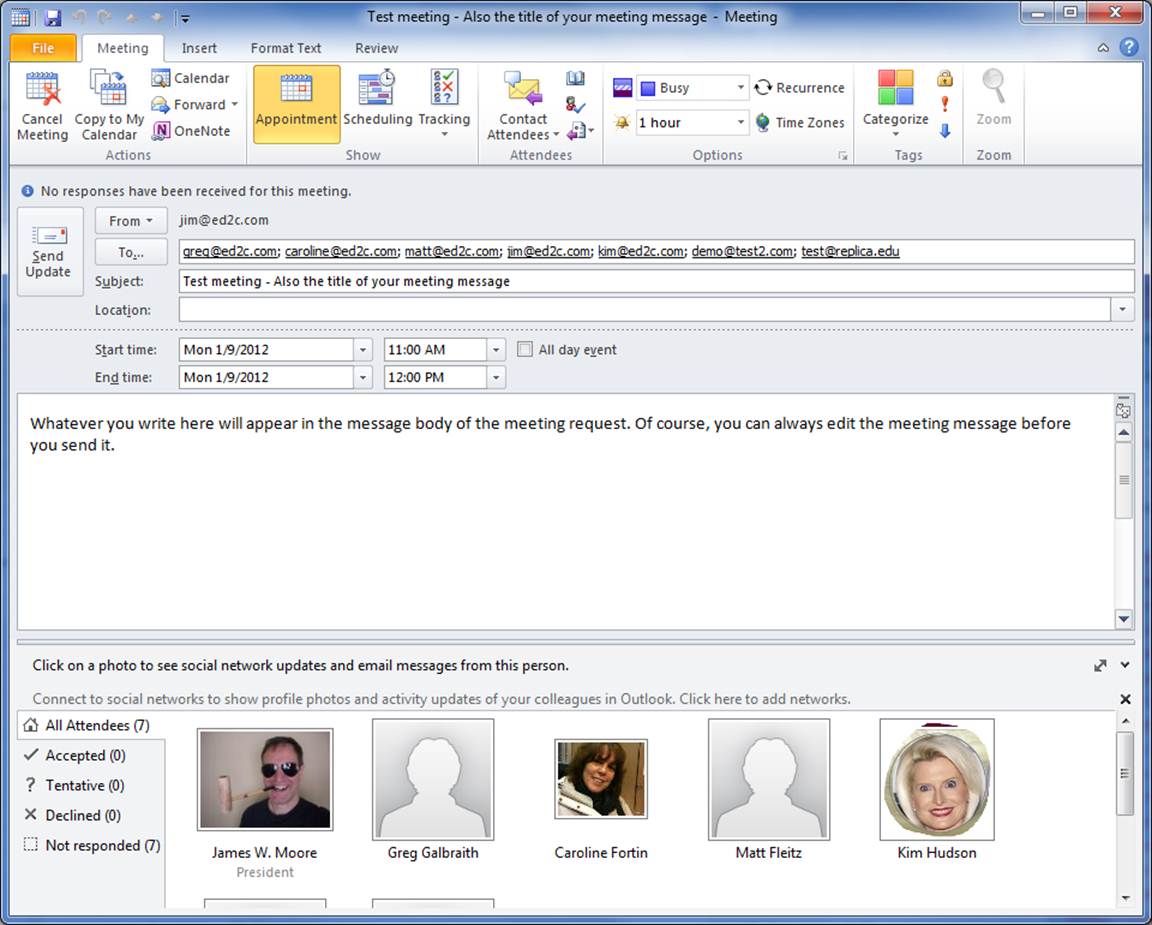
“Database Users” for staff, or “People” for volunteers. The sample below shows what the meeting
invitation will look like if it is opened with
Microsoft Outlook 2010.
If you’re using NetCIL on a local computer or
network, the calendar file will open automatically. If you’re
using NetCIL Online, the file will be stored on your local computer in the
folder C:\NetCIL Data, and you’ll receive a message that tells you where the
file is located. Minimize the NetCIL application, open a window on your local
computer, and open the file in order to use your locally-installed
email and calendar application.
When NetCIL Client is opened, it will also
check for pending meeting invitations. If any are found,
a message will be displayed in the “Appointments” section of the Main screen as
shown below. Meeting notifications will remain for eight hours after their
scheduled start time, or until an “End Date” is recorded
in the corresponding task. The meeting record will remain in the “Assigned
Tasks” section until an end date is recorded.

Inventory
and donation tracking has been greatly enhanced. You can track items
individually, or you can track groups of items and loan or gift them from
inventory. NetCIL keeps track of quantity on hand based upon the number of
items that have been loaned (or gifted) and the item’s
beginning inventory. If a name is listed in the “current recipient” field,
double-clicking the field will automatically open the corresponding
“Assistance” record .

If the quantity on
hand value is at least 1, double-clicking either the
“Beg Inv” or “QOH” fields will open a dialog with a
list of potential recipients. If one is selected, an
Assistance record will be automatically added.

Data can be edited as appropriate. If the “Type” is set to “Gift”, the “Due Date” and “Date Returned” fields
will be disabled. When a new record is entered, “Inventory Items” will be
filtered by the selected
“Assistance Equipment Type” and the quantity on hand amounts.
Items that show a quantity on hand of zero will not be available.

NetCIL 1.22 now
generates agreement letters for both loans and gifts. You can override the
default text of the agreement forms by placing text files called “Borrower
Agreement” and “Gift Agreement” in the “\Site Documents” subfolder where your file
server is located, as shown below:

NetCIL
now creates two “reserved” letters. One is a newsletter; the other is a “Past
Due Loans” letter. With NetCIL’s built-in mail merge capabilities, you can
auto-generate “Past Due” letters to all recipients who have overdue equipment.
It isn’t necessary to select a group when generating
past due letters.

Duplicate Records:
Selecting this report will generate an Excel spreadsheet that lists all
duplicate personal and organization records.
The report can be used with the NetCIL Manager
“Combine” functions to help eliminate duplicate records and keep your database
clean.
Inventory: The
Inventory input form and corresponding Excel spreadsheet report have been greatly expanded to include monetary donations and
keyword associations.
Overdue
items: An Excel spreadsheet report of loaned items that are overdue for return.
Keywords: An Excel
Keyword Report has been added that shows all people,
organizations, projects, and inventory / donations that are associated with a
keyword.
Referrals: A new
Excel Referral report has been added.
Staff Performance:
Report has been greatly expanded. When an individual
user is chosen, the report generates service and work
log detail tabs as well as a list of associated consumers.

NetCIL Online users automatically have access to the new application.
For all other NetCIL / CFAL users, NetCIL Desktop Client Version 1.2 Beta is
now available for download. If you
choose to install it, please be sure to follow these procedures:
- Ensure that you create a backup copy
of your data.
- Ensure that you have Office 2007
Professional with Service Pack 2 or Office
2010 Professional with Service
Pack 1 installed – The beta application will not work in any other
configuration.
- Before you download and run the
installation file for the first time, ask all other users to temporarily exit any NetCIL applications.
- Download and run the installation
file: http://netcil.com/downloads/netcilclientsetupb.exe.
- After a successful installation, the
application will tell you that your file server needs to be updated; you must allow it to do so before
proceeding. This process only needs to be performed
once.
- Repeat step 4
on any other workstation that you wish.
- Please provide us with feedback by
writing to techsupport@ed2c.com
or calling us toll-free at 888-678-0683 x0.